PLAYER REFERENCE · REVISED OCTOBER 17, 2026 · LOCAL BUILD v0.3.0
Download the print & bind PDF · Print at 100% scale using the paper size and duplex setting listed in the PDF’s production notes.
Forty illustrated rooms, drawn from the shipped tileset at native resolution, with hand-placed map callouts. This guide follows the local continuous-campaign candidate: three chapters with carried gear and story, three world repairs and three distinct bosses. The retained map plates show exploration layouts; fight boundaries, repair previews and temporary supports are explained in the text. This is a strategy guide, so it spoils the game on purpose; Chapters 2 and 3 carry warnings so a first-time player knows where to stop.
How to read these maps
Choose the intended save slot before starting. New Adventure replaces only that slot after confirmation. After Chapters 1 and 2, finish the saved interlude and choose Continue Adventure: owned/equipped gear, Credits, story, contracts, discoveries and one-time map progress carry forward. Arriving in the next chapter heals you to your retained maximum HP; ordinary Continue restores saved HP. Unlocked Chapter Practice is temporary and transfers no purchases, rewards or progress into either adventure slot.
Each boss completion saves a fixed 2 Credits once. Retry Save must succeed before a failed summon, victory or chapter arrival can proceed. Reloading a fight returns to its full-health pre-attempt checkpoint, with the boss and its temporary mechanics reset. After Chapter 3, Completed Adventure can replay the ending or Explore Restored World; earlier-area visits preserve the highest chapter, repairs and settled boss guards.
A repair save warning means the live change is not yet durable. Use Retry Save before leaving or reloading; reload restores the last saved checkpoint. Retry Checkpoint also restores that checkpoint, while paid Backup Sync is a one-use snapshot for the same adventure and chapter. An old unlock-only profile cannot recover lost gear: its disclosed Resume Unlocked Chapter starts with a standard kit in the selected empty slot.
The illustrated maps use real game art at 1:1 and whole-number magnification. Use the 1× / 2× / 3× / 4× buttons on each map; wide maps scroll inside their own frame. Focus a map frame and use the arrow keys to pan, or swipe horizontally on touch. The map key repeats marker names without relying on hover.
Numbered pins run top to bottom, then left to right, so pin 7 is always findable. Pins list the coordinates recorded for the retained map plates. Read the current walkthrough beside each plate for changed repair, encounter and reward behavior.
If you are cross-checking against src/world.js: the engine grows undersized rooms to a common frame, so a room's built coordinates sit a tile or two off its authored literals. Subtract the map's frame pad. The plaza, the Under-Shrine, Port Subnet and the Old Forest Road are unpadded and match exactly.
Diamonds are enemy spawn points from the map definition, not where enemies will be standing when you arrive. A hollow red ring is a boss arena.
White arrows are the intended route through a map, not the only way through. Hover any marker for its name and tile.
Start here for controls and preparation. The chapter routes below tell you which story steps are required; equipment, shops and side contracts are optional ways to make the journey more comfortable.
Keyboard quick reference
Move
Arrow keys or WASD
Attack
Z, J or Space
Interact
X, K, E or Enter
Accept / equip
Enter, Z or J in menus
Back
Esc; also pauses during play
Pause
P or Esc
Field Guide
I; C opens Character
Guide tabs
[ and ]
Help / mute
F1 / M
Face the sign, terminal, door or support before interacting. Walking over the Shard Key collects it automatically.
Controller & touch
On a standard Xbox mapping, use the left stick or D-pad to move, A to attack or accept, X to interact and B to go back. Menu pauses, View opens the Field Guide, Y opens Character, and LB / RB change guide tabs.
The on-screen deck uses the same A / X / B actions plus GUIDE and MENU. In Pause, cycle TOUCH PAD between auto, on and off; use DISPLAY to choose a scale that fits your screen.
In Character, choose a gear row, open its picker, select an owned item and confirm to equip it. In Map, select an area with up/down, change filters with left/right, and accept to enter its marker list. Back returns to area selection.
Choose your equipment
The Shard-Blade is enough for all three bosses. The optional Signal Bow fires in the direction you face and gives more space; find one in the Under-Shrine or West Row House. A new gear chest offers an explicit equip choice. An already-owned piece pays 6 Credits.
Armor lengthens invulnerability after taking a hit. It does not reduce the damage of that hit.
Haste increases walking speed and shortens attack cooldown.
Signal increases arrow speed and lifetime.
These bonuses are modest; read telegraphs and attack during safe windows. Your owned items and chosen loadout carry between adventure chapters.
Spend Credits deliberately
All mandatory story steps are free. Pump configuration, ledger correction and switchboard release require their story conditions, not a payment. The Archive Permit is earned through the corrected civic route.
A standard Sync terminal offers Health Sync for 3 Credits, Backup Sync for 8, Vitality for 15 and Signal Boost for 10 after reading the relay log. Vitality and Signal Boost are one-time capacity upgrades. Shop offerings vary by terminal and chapter.
There is no need to buy healing just before a boss confirmation: its sanctuary checkpoint restores full HP. Optional paid arena runs consume their entry stake. If you have at most 2 Credits and no active contract, a local board can offer a 3-Credit Salvage Advance once per chapter.
Keep your adventure safe
Select slot A or B before starting or continuing. Saves are stored in this browser. Keep using the same browser profile and site address to return to them.
Continue Adventure after a chapter interlude carries the same run forward. Chapter Practice is temporary; its purchases and rewards do not join an adventure. Retry Checkpoint restores the saved state. A boss reload restores its full-health pre-attempt checkpoint.
After a save warning, choose Retry Save and wait for success before leaving. A live repair or reward shown on screen may still be unsaved. Backup Sync is a separate one-use snapshot bound to that adventure and chapter.
When the route seems stuck
Gateway sealed: check Shard, Old Runner notes, carrier trace and applied pump setting.
Compute route blocked: collect both household voices, clear and correct Ledger Cellar, then follow the free permit and archive route.
Heart guarded: release each support during the attempt and strike only during recovery; the HP floors are intentional.
Missing objective: open the Journal and pin the current quest. Use this guide’s chapter critical path to check earlier prerequisites.
Coverage: this edition illustrates 40 rooms and covers the complete three-chapter story route plus all six optional Quad H rooms. Their native figures show supplied arrival states; they do not show earning the descent. Patch Bay has separate west and east views. The developer Tile Showcase is excluded.
1
The Quiet Plaza
Wake the dead west line
A courier road that stopped answering. Chapter 1 is a four-key lock wearing a landscape: recover the Shard, gather three field seals, open the Gateway, sync the relay, then answer the shrine and hold your ground when something answers back.
The critical path
Talk to PIPWest of the plaza avenue. Taking the Shard also clears this soft story step.
Take the Shard KeyNorth room of the Under-Shrine. Walk over it; no button needed.
Answer the plaza shrineInteract and confirm Desync. Victory saves the interlude; Continue Adventure carries this run to Port Subnet.
The main illustrated Chapter 1 connections, laid out by distance from the hub. Magenta dashes are secret doors. Click a room to jump to its map. The optional Studio descent continues to the Undercroft, where the optional six-room descent is documented below.
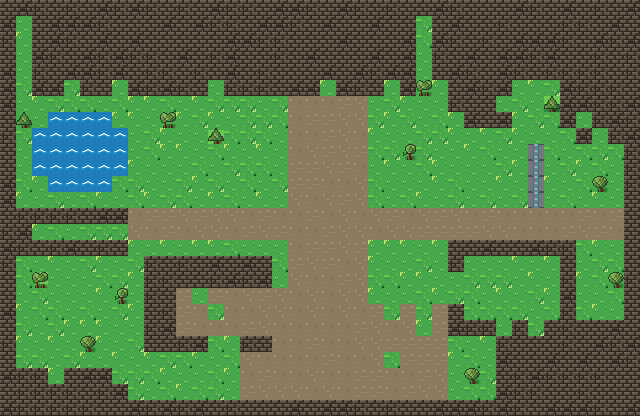
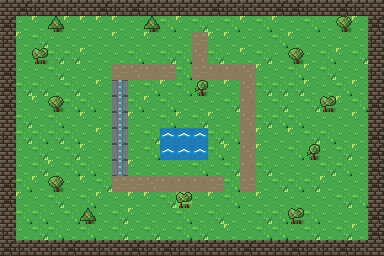
Every road in Chapter 1 starts and ends here. The layout is deliberately legible: one five-tile civic avenue running north from spawn, one cross street at y=13-14 running the full width, and every branch hanging off those two arteries. If you are lost, get back on the avenue.
Runner's log, day unknown. The east line answers. The west shrine does not. Find the shard. Reopen the route.Sign above spawn
The four Gateway requirements are spread across the plaza routes: Under-Shrine (north), Old Runner House (north), Marsh Pump House (far east), Cable Marsh → Relay Hut (far east).
The Marsh Pump House door at (35, 10) sits two tiles west and one south of the Cable Marsh door at (37, 9). Check the separate pump door before returning from the marsh.
The bunker secret door at (4, 5) has no prerequisite whatsoever. You can open it on your first lap, and the Seal Archive behind it is a free reroute node.
The boss arena is at (10, 12) — the open field between the Gateway and the shrine. A temporary boundary contains the attempt; ambient plaza enemies are suspended until it ends.
Key
1
SECRET — Packetloss404 Bunker(4, 5)A patch of suspicious brick in the north-west wall. Face it and press X once to reveal, again to enter. No prerequisite at all — you can open this on your very first lap.
2
Signal Tower door(7, 5)The relay shrine. Nothing to do here until you hold the Shard, the Relay Coil and the Choir Blessing.
3
Old Runner House(13, 5)Gate key 2 of 4 lives on the terminal inside.
4
Under-Shrine door(20, 5)North face of the ruin. The Shard Key is inside — this is objective two and the first place the game expects you to go.
5
Relay Annex(24, 5)Three trace signs and the hidden vault behind them.
6
Chest — 7 credits(10, 9)
7
Chest — SIGNAL VISOR(30, 9)Head slot, signal 2.
8
Cable Marsh door(37, 9)East exit. Leads to the Relay Hut and gate key 3.
9
Marsh Pump House(35, 10)Gate key 4. Easy to walk past — it sits two tiles west and one south of the Cable Marsh door.
10
HANDSHAKE 1/4 — Carrier BBS(31, 11)First terminal of the plaza handshake. Touch these four in order for a +6 credit bonus.
11
HANDSHAKE 2/4 — Sync terminal(34, 11)Also the SYNC shop: Health Sync 3c, Backup Sync 8c, Shard of Vitality 15c (+4 max HP), Signal Boost 10c.
12
HANDSHAKE 3/4 — Loadout terminal(36, 11)Gear vendor. Relay Mail for 12c, auto-equipped.
13
HANDSHAKE 4/4 — West BBS(4, 12)Completing the order here pays +6 credits. Any out-of-order touch prints HANDSHAKE LOST and resets you to zero.
14
SYNC SHRINE — boss trigger(2, 14)Needs the Shard, the Gateway open and the Relay synced. Interact and explicitly confirm Desync. A successful sanctuary save restores retained max HP before the bounded attempt; standing against the shrine does not summon it.
15
THE GATEWAY(6, 14)Four-lock gate, order irrelevant, all four mandatory: Shard Key + Old Runner notes + Carrier Tone + Pump Seal. Closed, it is solid wall.
16
Street Merchant(24, 18)Potion 6c full heal; PEP TONIC 4c restores up to 4 HP; Carrier Postcard 10c.
17
PORTAL OFFLINE SIGN(27, 18)Offline sign. The live exit is in the Portal Gallery in Port Subnet.
18
PIP, OLD COURIER(13, 19)Still maintaining a road nobody uses. Points you at the Under-Shrine and clears the first objective. "The west line came back. My partner did not."
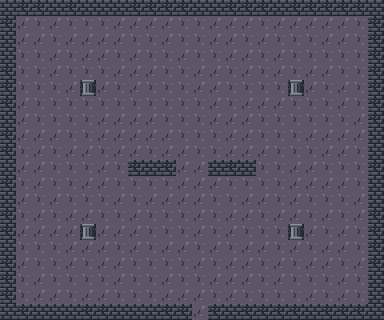
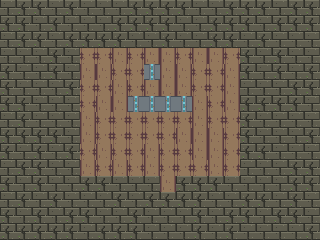
One large hall with the Shard on a pedestal at the top and a four-swarm nest in the south-east corner. The far north-west door leads to the west wing, which you will need later for the Choir Blessing.
The shard remembers the old path. What crossed it remembers you.Entrance sign
Threats 4× Glitch · 6× Swarm · 1× Caster
Runner's notes
The Shard is picked up by proximity — you do not need to face it or press anything.
Both chests here are gear, not credits. The optional SIGNAL BOW in the south-east offers EQUIP or KEEP CURRENT. Choose EQUIP to switch to ranged; ownership alone does not switch weapons.
The four swarms at (19-20, 16-17) are packed into one corner. Fight them at the corridor mouth, not inside the pocket.
Key
1
To the West Under-Shrine(1, 1)Far north-west corner. Use the CHOIR SEAL terminal inside for the Choir Blessing. Entry alone does not grant it.
2
THE SHARD OF SYNC(11, 4)The chapter's master key. Opens the Gateway and wakes the Relay Shrine. Walking within a few pixels picks it up — you do not have to press anything.
Chest — SIGNAL BOW(21, 15)Optional weapon. Choose EQUIP to switch to ranged or KEEP CURRENT to retain your current weapon. A bow is not required for any boss.
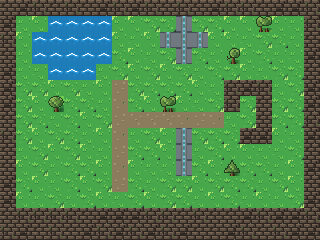
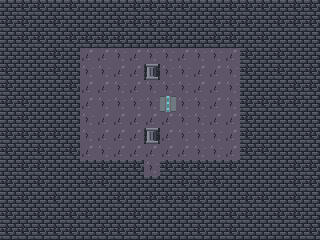
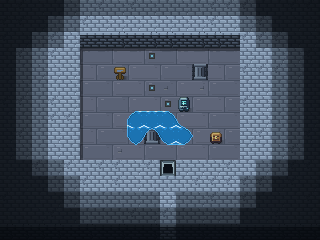
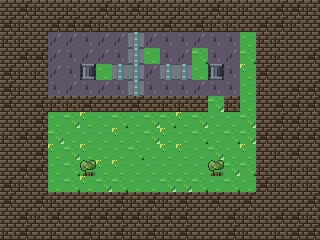
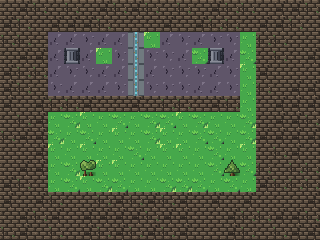
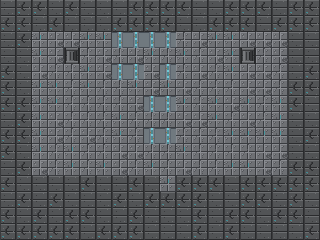
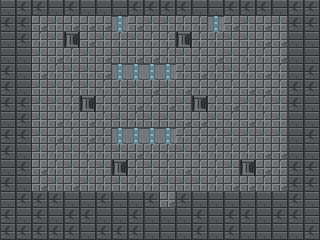
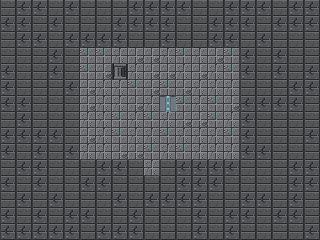
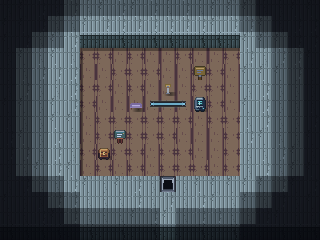
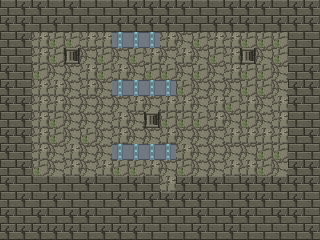
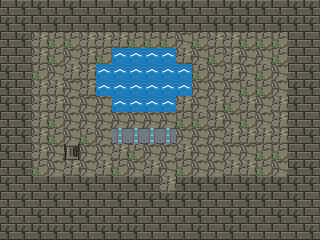
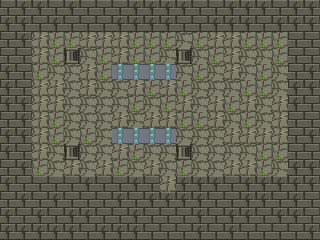
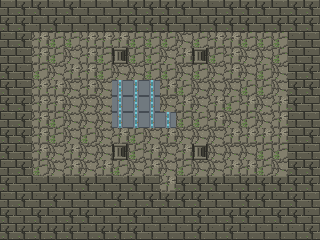
Supplied initial unprimed view: all six basin cells are flooded. Runner, actors and interface panels are hidden in all three views; chests remain unopened. Numbered markers apply to every view; the guard marker is salvage-only.
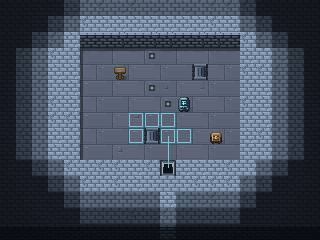
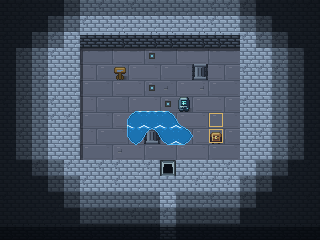
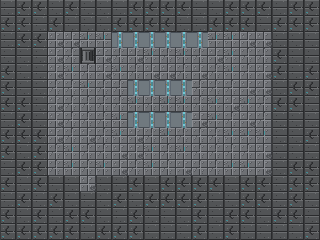
Preview DRAIN THE ROUTE for a dry crossing, or WAKE THE CACHE for its optional 7-Credit chest and guard. APPLY either setting for the required pump seal. Preview/Cancel are free; switching is free and reversible, the perimeter stays open, and neither a claimed chest nor defeated guard renews.
West shrine quiet. Marsh pumps coughing. If I do not return, follow the dry reeds.Runner log
Threats 1× Glitch (WAKE THE CACHE only)
Key
1
PUMP SEAL — gate key 4(11, 6)Inspect, preview one setting, then APPLY. One setting is enough for the Gateway; collecting the optional cache is not required.
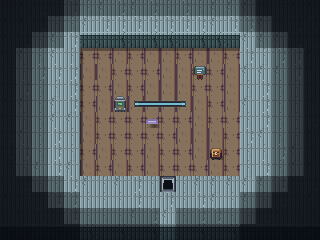
Supplied applied route view: the six basin cells become walkable floor, outlined in cyan. The optional 7-Credit cache is unopened and its guard stays dormant. Actors and interface panels hidden.
WAKE THE CACHE — applied20 × 15 tiles · 320 × 240 px native
Supplied applied salvage view: the six basin cells stay flooded. The optional 7-Credit cache is powered and its guard is awake. Yellow outlines mark the unopened cache and living guard; they are not actor bodies or evidence of a cleared cache. Actors and interface panels hidden.
Three trace signs in a shallow arc and a hidden vault in the back wall. Read them LEFT, then CROWN, then RIGHT. Any other order prints TRACE BROKEN and puts you back to zero.
Threats 2× Sentinel · 1× Glitch
Runner's notes
The vault door also opens if you simply walk up and inspect the bricks — the trace is the intended route, not an enforced one.
Key
1
TRACE 2/3 — crown(9, 3)The top sign. Second in the order.
2
Chest — 9 credits(12, 3)
3
TRACE 1/3 — left(6, 4)Read the three trace signs left, then crown, then right. Out of order prints TRACE BROKEN and resets.
4
TRACE 3/3 — right(12, 4)Completing the trace forces the vault door open.
5
SECRET — Broken Relay Vault(14, 4)Read TRACE LEFT, TRACE CROWN, then TRACE RIGHT. The bricks remain sealed until that sequence is complete.
Use the CHOIR SEAL shell terminal to recover the Choir Blessing required by the Signal Tower. Entering the room alone does not grant it. The chest is optional.
The older seal is here, under the newer silence. Do not trust a route that answers too quickly.West wing sign
Threats 1× Sentinel · 1× Swarm
Key
1
Civic node (flavour)(11, 7)Read the choir seal here to receive the Choir Blessing and advance the relay objective.
2
Chest — 11 credits(18, 9)
3
To The Under-Shrine(11, 11)
The Signal Tower
20 × 15
The Signal Tower20 × 15 tiles · 320 × 240 px native
123
Two sentinels flank the approach to the relay shrine. Nothing here works until you hold the Shard, the Relay Coil and the Choir Blessing — come back last.
The first relay to answer after the fall. Its cables still carry the hum.Tower sign
Threats 2× Sentinel · 1× Glitch
Key
1
RELAY SHRINE(9, 2)Three locks: Shard Key + Relay Coil + Choir Blessing. Syncing here is the last step before the plaza shrine.
2
Chest — PACKET PIN(12, 3)Charm, haste 1 + signal 1.
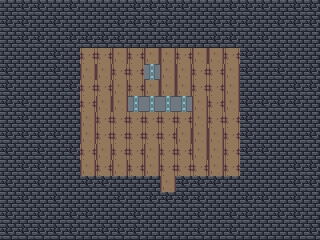
The best-lit room in the game and the only one with hand-authored god rays. Reached through the unmarked brick in the north-west wall of the Quiet Plaza — callout 1 on that map — with no prerequisite at all.
No hostiles.
Runner's notes
The router prop at (6, 8) is the CARRIER SWEEP puzzle. Three dials start at L=1 M=2 R=0 and the target is L=3 M=1 R=2.
Each dial drags its neighbours: L raises L and M; M raises M but LOWERS L and R; R raises R and M.
The solution is R, R, M, then LOCK PROFILE. Reward: the ARCHIVE CACHE module.
Key
1
To The Seal Archive(19, 6)
2
BBS terminal(14, 8)
3
Future Ops terminal(16, 8)
4
To The Quiet Plaza(9, 11)
The Seal Archive
20 × 15 · OPTIONAL
The Seal Archive20 × 15 tiles · 320 × 240 px native
1234
Behind the bunker. A reroute node, a BBS and an optional 10-Credit chest. Read the return slip for PIP's optional story payoff; entering alone does not read it.
Two mugs. One route. PIP left a light for the other carrier.Runner's return slip
Threats 1× Glitch
Key
1
Future Ops terminal(13, 4)
2
BBS terminal(14, 8)
3
Chest — 10 credits(6, 9)
4
To Packetloss404 Bunker(10, 11)
Quad H HQ
20 × 15 · OPTIONAL
Quad H HQ20 × 15 tiles · 320 × 240 px native
12345
Side content with no enemies. Steps 1-3 of the broadcast route puzzle live here; step 4 is the bookcase itself. The bookcase opens when that sequence is right.
Signal house of Dr. Vibe. Streamline keeps the lamps on.HQ sign
No hostiles.
Key
1
ROUTE 1/6 — Dr. Vibe terminal(10, 5)Start of the broadcast route puzzle. Also pays +1 VIBE the first time.
2
SECRET — studio staircase (ROUTE 4/6)→ Quad H Studio(16, 7)The east bookcase opens after the Dr. Vibe terminal, stream rig sign and lab notes sign, in that order.
3
ROUTE 2/6 — stream rig sign(6, 8)
4
ROUTE 3/6 — lab notes board(11, 8)
5
To The Quiet Plaza(10, 11)
Quad H Studio
24 × 15 · OPTIONAL
Quad H Studio24 × 15 tiles · 384 × 240 px native
1234
Steps 5 and 6. Finishing the route unlocks the STREAM WATCH module and turns the studio terminal into a shop and a reroute node. Optional descent: after the route opens the hatch, Interact with it to enter the Undercroft.
Red light warm. Cameras ready. Broadcast the route.Studio sign
No hostiles.
Key
1
Terminal(20, 5)
2
ROUTE 5/6 — main stream desk(16, 7)
3
ROUTE 6/6 — future terminal(20, 7)Finishing here unlocks the STREAM WATCH module and turns this terminal into a shop and a reroute node.
4
To Quad H HQ(11, 12)
Quad H Undercroft
20 × 15 · OPTIONAL · SUPPLIED ARRIVAL
Undercroft · arrival
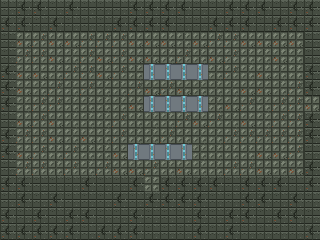
Supplied Undercroft arrival view after Studio route completion. Junction untouched and fan cover closed. Runner, actors and interface hidden. This view does not show earning the route, solving the junction or collecting a hidden reward.
Choose 1×–4× to inspect the native map. Focus the map region and use the arrow keys, or swipe horizontally, to pan. The directory below lists authored object locations without adding pins to the image.
After the HQ and Studio broadcast route opens the Studio hatch, Interact with the hatch to enter. Interact with the junction signs in north-to-south order: (10, 5), (10, 7), (10, 9). A wrong junction resets the partial sequence. Completing it opens the fan cover at (16, 10); the cover has no passage or reward. Finish the junction to use the south door at (10, 11), which leads to Carrier Basement.
CABLE LOOM Read junctions 1, 2, 3 from north to south. The south door continues the route. The fan cover is not a passage.Undercroft sign
There is no time limit. Completed rooms stay solved after a successful save. If saving fails, use Retry Save to keep the completed progress; reloading restores the last successful save. Leaving or loading restarts an unfinished sequence. Return doors remain free.
Closed fan cover — world tile (16, 10); native center (264, 168)
Carrier Basement
20 × 15 · OPTIONAL · SUPPLIED ARRIVAL
Carrier Basement — arrival
320 × 240 px native
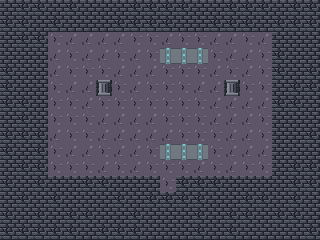
Supplied Carrier Basement arrival after the Undercroft junction. All five contacts are unpressed; the Carrier sequence is untouched. Runner, actors and interface hidden. Earlier progress is supplied; this view does not show earning the route or collecting a reward.
Choose 1×–4× with the zoom buttons. Tab to the named map region and use Left/Right Arrow to pan; on touch, swipe horizontally. Use normal page scrolling to reach the full image and caption.
Walk the five floor contacts from the BBS toward the wall board: (2, 4), (4, 4), (5, 4), (7, 4), (8, 4). The fifth new contact completes this room and opens the way south. Read the wall board for instructions. A wrong contact resets only this unfinished trace. Step off, then begin again at the BBS. Gaps and waiting are safe; there is no time limit.
Completed rooms stay solved after a successful save. Leaving or loading restarts an unfinished sequence. Return doors are free.
Room sign — world tile (3, 8); native center (56, 136)
Patch Bay
24 × 15 · OPTIONAL · SUPPLIED ARRIVAL
Patch Bay — west view
320 × 240 px native
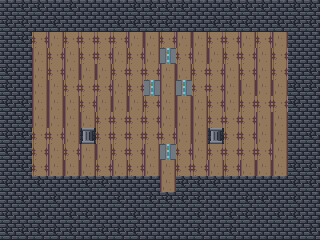
Supplied Patch Bay arrival after Carrier Basement. Trace sequence untouched; Archive rack closed. This is one separate native viewport of a 384 × 240 world, not a panorama. Runner, actors and interface hidden. Earlier progress is supplied; this view does not show earning the route or collecting a reward.
Choose 1×–4× with the zoom buttons. Tab to the named map region and use Left/Right Arrow to pan; on touch, swipe horizontally. Use normal page scrolling to reach the full image and caption.
Trace 1 — world tile (1, 2); native center (24, 40)
Trace 2 — world tile (4, 2); native center (72, 40)
Trace 3 — world tile (8, 2); native center (136, 40)
Trace 4 — world tile (10, 2); native center (168, 40)
Trace 5 — world tile (8, 4); native center (136, 72)
Trace 6 — world tile (11, 4); native center (184, 72)
Trace 7 — world tile (19, 7); native center (312, 120)
Trace 8 — world tile (14, 10); native center (232, 168)
Room sign — world tile (12, 2); native center (200, 40)
Room sign — world tile (14, 2); native center (232, 40)
Room sign — world tile (16, 2); native center (264, 40)
Room sign — world tile (18, 2); native center (296, 40)
Room sign — world tile (2, 4); native center (40, 72)
Room sign — world tile (5, 4); native center (88, 72)
Room sign — world tile (12, 4); native center (200, 72)
Room sign — world tile (16, 4); native center (264, 72)
Room sign — world tile (19, 4); native center (312, 72)
Room sign — world tile (3, 7); native center (56, 120)
Room sign — world tile (7, 7); native center (120, 120)
Room sign — world tile (11, 7); native center (184, 120)
Room sign — world tile (16, 7); native center (264, 120)
Room sign — world tile (4, 10); native center (72, 168)
Room sign — world tile (8, 10); native center (136, 168)
Room sign — world tile (17, 10); native center (280, 168)
Room sign — world tile (3, 11); native center (56, 184)
See the separate east view for the far side of the room. Its overlapping pixels are not stitched.
Interact with trace panels 1–8 in order. Each numbered READ TRACE prompt identifies its panel. A wrong numbered panel resets this unfinished trace; unnumbered boards do not reset it. The eighth panel opens the Archive rack at (11, 12). The separate west and east views overlap; neither is a panorama.
Completed rooms stay solved after a successful save. Leaving or loading restarts an unfinished sequence. Return doors are free.
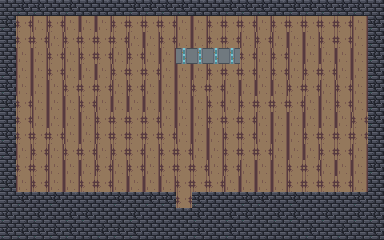
Supplied Patch Bay arrival after Carrier Basement. Trace sequence untouched; Archive rack closed. This is one separate native viewport of a 384 × 240 world, not a panorama. Runner, actors and interface hidden. Earlier progress is supplied; this view does not show earning the route or collecting a reward.
Choose 1×–4× with the zoom buttons. Tab to the named map region and use Left/Right Arrow to pan; on touch, swipe horizontally. Use normal page scrolling to reach the full image and caption.
Supplied Archive Core arrival after Patch Bay. The cork-board beat is unread. Runner, actors and interface hidden. Earlier progress is supplied; this view does not show earning the route or collecting a reward.
Choose 1×–4× with the zoom buttons. Tab to the named map region and use Left/Right Arrow to pan; on touch, swipe horizontally. Use normal page scrolling to reach the full image and caption.
Read the cork board at (10, 4). Its story remains readable on later visits. The south door at (10, 11) then leads to Quiet Room. The north door freely returns to Patch Bay.
Completed rooms stay solved after a successful save. Leaving or loading restarts an unfinished sequence. Return doors are free.
Room sign — world tile (16, 10); native center (264, 168)
Quiet Room
20 × 15 · OPTIONAL · SUPPLIED ARRIVAL
Quiet Room — arrival
320 × 240 px native
Supplied Quiet Room arrival after Archive Core. All three contacts are unpressed; the Quiet sequence is untouched. Runner, actors and interface hidden. Earlier progress is supplied; this view does not show earning the route or collecting a reward.
Choose 1×–4× with the zoom buttons. Tab to the named map region and use Left/Right Arrow to pan; on touch, swipe horizontally. Use normal page scrolling to reach the full image and caption.
Walk the MIC, CHAIR and BACK WALL floor contacts at (10, 6), (10, 8), (9, 10), in that order. The third new entry opens the way south. A wrong marked contact resets only this unfinished path; step off and start again at MIC. Waiting and blank floor do not reset it. Read the D.V. sticky for instructions. The room’s lamps are decorative.
Completed rooms stay solved after a successful save. Leaving or loading restarts an unfinished sequence. Return doors are free.
Supplied Room Behind arrival after Quiet Room. The final Post-it is unread and the Ledger Lens chest is unopened; the lens is not owned. Runner, actors and interface hidden. Earlier progress is supplied; this view does not show earning the route or collecting a reward.
Choose 1×–4× with the zoom buttons. Tab to the named map region and use Left/Right Arrow to pan; on touch, swipe horizontally. Use normal page scrolling to reach the full image and caption.
Read the FIRST BROADCAST Post-it at (10, 9) to finish the descent and hear Dr. Vibe’s closing words. The note grants no item or Credits. Rereading it reopens the closing dialogue. The separate chest at (15, 5) holds the Ledger Lens: the first Lens adds no Credits and offers EQUIP or KEEP CURRENT; if already owned, it gives 6 Credits. Return north freely through Quiet Room and the earlier rooms.
Completed rooms stay solved after a successful save. Leaving or loading restarts an unfinished sequence. Return doors are free.
SPOILERS AHEAD — Chapter 2 is late-game content. Nothing below is hidden; stop here if you are still on Chapter 1.
Two valid household signatures were sent to one destination. Recover both voices, keep both homes served and correct the routes without changing the total. The corrected ledger grants Archive Override free; then boot the hall, recover the Root Phrase and arm final sync.
Arm the final syncOpen the lobby's west archive door with the free permit. Admin checks permit + Root Phrase + Ledger Seal.
Return to Lobby OpsConfirm Archive Echo; victory saves the interlude and Continue Adventure leads to Old Forest Road.
Retained Chapter 2 door schematic. Magenta dashes are secret doors. Current Archive Override is free from the corrected ledger; legacy purchase annotations are historical. Click a room to jump to its map.
Port Subnet
24 × 18 · Chapter 2 hub · spawn (12, 15)
Port Subnet24 × 18 tiles · 384 × 288 px native
12345678910111213
Eight doors and no enemies. Four row houses on the flanks, the compute hall due north, the tunnels and cellar in the middle, and the Chapter 3 road at the bottom. Two of the four houses are mandatory and two are not, and the map gives you no way to tell which.
Warm lamps. Quiet routers. The district remembers enough to answer.Plaza sign
No hostiles.
Runner's notes
MANDATORY: north row (Voice A) and south row (Voice B). OPTIONAL: east and west rows.
The south-east masonry at (22, 15) is a secret door with no prerequisite, and the room behind it holds a 100 credit chest.
Standing on the Old Forest Road door at (15, 16) will teleport you into Chapter 3 whether or not you have unlocked it. The interact path checks; the walk-on path does not.
Key
1
Civic Compute Hall(11, 3)The chapter's dungeon. Lobby, then core.
2
FUTURE OPS terminal(13, 8)Jobs, paid runs, reroute and optional services. Archive Override is a free reward from the corrected Ledger Cellar; no purchase is required for the main story.
3
Ledger Cellar(13, 9)Mandatory. With both voices and the room clear, APPLY KEEP BOTH HOMES for the Ledger Seal and free Archive Override.
4
North Row House — Voice A(4, 10)Mandatory. The Auth terminal will not run without it.
5
East Row House(19, 10)Optional. Flavour and a 5 credit chest; its terminal sets no flag.
6
South Row House — Voice B(3, 12)Mandatory. The Auth terminal and a new ledger correction require both household voices.
7
West Row House(20, 12)Optional. Holds the LEDGER LENS and a Future Ops terminal.
8
Street Merchant(8, 13)
9
Compute Lounge(17, 13)
10
Service Tunnels(18, 13)The Cooling Seal is here, and it is the first link in the boot chain.
11
SECRET — Portal Gallery(22, 15)The masonry opens on inspection. The optional 100-Credit chest behind the gallery corridor requires the Chapter 3 Portal Key; story progress never depends on this reward.
12
LEX, PORT JANITOR(4, 16)The only person in a records district who deals in floors instead of ledgers, and so the only one who notices. Sends you to the north row.
13
To the Old Forest Road (Chapter 3)(15, 16)Forward travel requires completing Port Subnet. Walking or interacting uses the saved interlude/arrival flow; earlier-area returns preserve the current campaign chapter and gear.
COOLING SEAL(12, 2)Grants the Cooling Seal and Lab Side Access in one read. Nothing in the compute chain starts without it.
2
Chest — 8 credits(4, 4)
3
To Port Subnet(12, 11)
Ledger Cellar
20 × 15 · LEDGER SEAL · MANDATORY
Ledger Cellar20 × 15 tiles · 320 × 240 px native
123
Supplied corrected, room-clear Ledger view. The routes serve NORTH 04 and SOUTH 04 (TOTAL 08). Runner, actors and interface panels hidden; the 12-Credit chest is unopened. Numbered annotations and enemy markers retain authored locations; they do not show live enemies. Use 4× zoom for receiver labels.
Recover both voices and clear the room before APPLY. KEEP BOTH HOMES routes NORTH 04 and SOUTH 04 to separate receivers; TOTAL 08 stays unchanged. The correction grants the Ledger Seal and Archive Override free, regardless of wallet.
Old civic debts sleep under the row houses. Every column wants the same ending.Cellar sign
Threats 1× Caster (elite) · 1× Glitch (elite)
Key
1
LEDGER SEAL(12, 3)Preview KEEP BOTH HOMES, then APPLY with both voices and room clear. Preview/Cancel and the rejected MERGE ROUTE 1 cost nothing. Corrected routes are permanent; both houses show LIVE on revisit.
The quietest dangerous room in the game. Lobby Ops at (9, 4) is one tile that does three different jobs depending on how far along you are — boot acceptance, then shop, then boss trigger.
Three seats dark. One seat waiting.Lobby console
No hostiles.
Runner's notes
Leave the marked lane for both pulses, then approach Echo at the unmarked correction pad. Attack only during its two-second correction window.
The west wall secret at (3, 1) needs Archive Override, granted free by the corrected ledger. The annex admin also checks Root Phrase and Ledger Seal.
Key
1
SECRET — Archive Annex(3, 1)West wall of the lobby. Opens with Archive Override, granted free by the corrected Ledger Cellar. Root Phrase and Ledger Seal are still required at the annex admin terminal.
2
LOBBY OPS — one tile, three states(9, 4)Before the boot it accepts the boot. Afterward it offers Future Ops services. With final sync armed it offers explicit Archive Echo confirmation; the sanctuary checkpoint must save before the fight begins.
3
To the Compute Core(15, 5)
4
To Port Subnet(10, 11)
Compute Core
20 × 15 · BOOT SEQUENCE
Compute Core20 × 15 tiles · 320 × 240 px native
12345
Three shell terminals in a strict dependency chain, spread diagonally across the room. There is no way to shortcut the order.
Power, auth, and memory still disagree.Core access sign
No hostiles.
Runner's notes
POWER needs the Cooling Seal. AUTH needs power plus BOTH voices. DIAGNOSTICS needs power and auth.
The Cooling Vault door at (15, 1) opens by itself once the hall is booted — you do not need to find it first.
Key
1
SECRET — Cooling Vault(15, 1)Back wall of the core. Opens itself once the hall is booted.
2
BOOT 1/3 — POWER(6, 4)Requires the Cooling Seal.
3
BOOT 2/3 — AUTH(10, 6)Requires power, Voice A and Voice B. Recover Voice B from the south row terminal if Auth is still blocked.
4
BOOT 3/3 — DIAGNOSTICS(13, 8)Requires power and auth. Then walk back to Lobby Ops to accept the boot.
5
To Civic Compute Hall(5, 11)
Cooling Vault
20 × 15 · ROOT PHRASE
Cooling Vault20 × 15 tiles · 320 × 240 px native
123
Five enemies including a Cooling Warden and an elite Caster. The root terminal will not read while any of them is alive.
Old load still sleeps under the hall. Wake it gently or not at all.Vault sign
Holds an optional SIGNAL BOW and a Future Ops terminal. Read the paper copies for LEX's optional story payoff: two households and two signatures were preserved. The terminal opens the shop but registers no reroute node.
No hostiles.
Key
1
Future Ops terminal(7, 6)Opens the shop but does NOT register a reroute node — this map is not in the table.
2
Chest — SIGNAL BOW(13, 9)Optional weapon. Choose EQUIP to switch to ranged or KEEP CURRENT to retain your weapon; an already-owned duplicate pays 6 Credits once.
3
To Port Subnet(10, 11)
Portal Gallery
21 × 17 · SECRET · 100 CREDITS
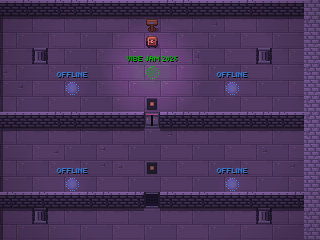
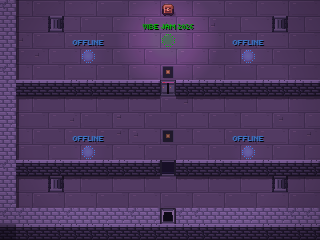
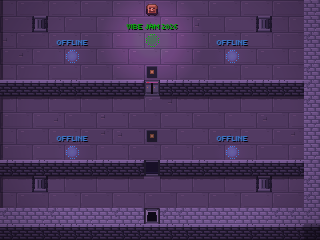
Legacy orientation schematic: this plate predates both corridor barrier rows and the man-trap doors. It cannot show the current chest route. Use the four separate current native views and optional route below. Current native views and optional route.
The gallery entrance opens on inspection. Its optional 100-Credit chest is behind a key-gated corridor requiring the Portal Key found in Chapter 3. The retained plate predates that corridor; the chest is not a mainline requirement.
Most rings are display ghosts. The center gate is live for Vibe Jam 2026.Gallery sign
No hostiles.
Key
1
Chest — 100 CREDITS(10, 2)Optional 100-Credit reward; the corridor requires the Chapter 3 Portal Key.
2
Display ghost(5, 5)Inert. "This portal is only a display ghost."
3
Display ghost(15, 5)Inert. "This portal is only a display ghost."
4
Live portal(10, 4)The one gate in the gallery that is not a display ghost.
5
Display ghost(5, 11)Inert. "This portal is only a display ghost."
6
Display ghost(15, 11)Inert. "This portal is only a display ghost."
7
To Port Subnet(10, 15)
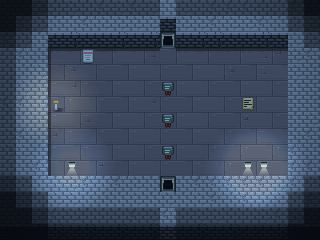
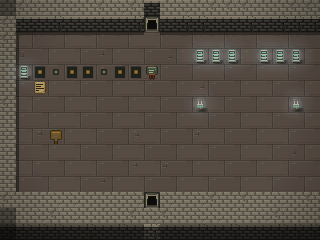
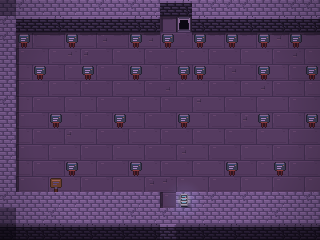
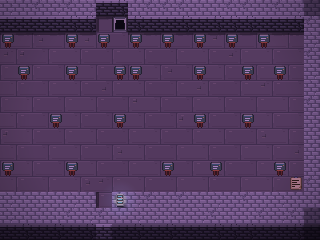
Portal Gallery — current native views
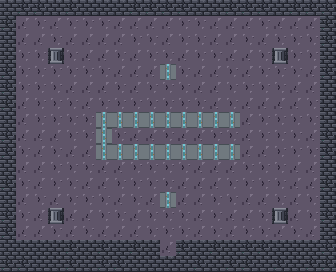
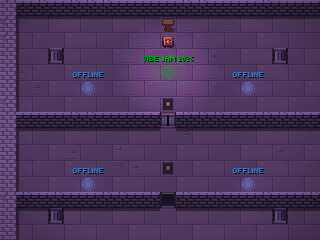
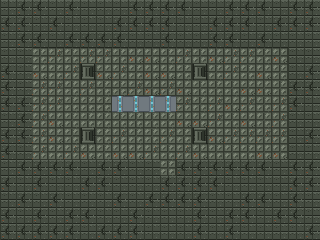
These four overlapping native views show the same supplied state. Together they cover the 336 × 272-pixel room. They are separate 320 × 240 captures, not a stitched panorama; viewport grading can differ in their overlap.
Choose 1×–4× with the zoom buttons. Tab to a named map region and use Left/Right Arrow to pan horizontally; use normal page scrolling for the full image and caption. On touch, scroll the map horizontally. Native images are not responsively resampled.
Gallery — north-west native view
320 × 240 px native
north west view; camera (0, 0), 320 × 240 native pixels. Supplied Chapter 3 replay revisit with Portal Key held: outer door 1 open, inner door 2 closed, both plates unpressed. The 100-Credit chest is unopened. Runner, actors and interface panels hidden.
north east view; camera (16, 0), 320 × 240 native pixels. Supplied Chapter 3 replay revisit with Portal Key held: outer door 1 open, inner door 2 closed, both plates unpressed. The 100-Credit chest is unopened. Runner, actors and interface panels hidden.
south west view; camera (0, 32), 320 × 240 native pixels. Supplied Chapter 3 replay revisit with Portal Key held: outer door 1 open, inner door 2 closed, both plates unpressed. The 100-Credit chest is unopened. Runner, actors and interface panels hidden.
south east view; camera (16, 32), 320 × 240 native pixels. Supplied Chapter 3 replay revisit with Portal Key held: outer door 1 open, inner door 2 closed, both plates unpressed. The 100-Credit chest is unopened. Runner, actors and interface panels hidden.
Shown open with the supplied key. Either plate or its remaining hold closes it.
Antechamber pressure plate — tile (10, 10)
Activates immediately on contact; holds for 2.5 seconds after stepping off.
Inner door 2 — closed — tile (10, 7)
Shown closed. Either plate or its remaining hold opens it.
Sanctum return plate — tile (10, 6)
Use this plate to reopen inner door 2 from the sanctum.
Gallery sign — tile (10, 1)
Describes the display ghosts and live portal; present only in the north native views.
Optional later revisit route
This is an optional later revisit. The Portal Key is in the Scriptorium chest at built tile (2, 10), reached in Chapter 3; the initial Chapter 2 visit cannot supply it. The chest itself adds no extra sigil, room-clear or fee requirement. In Port Subnet, Interact with the secret masonry at (22, 15) to open it, then Interact again to enter the Gallery. The four display portals are offline. The live exit at (10, 4) leaves CreditQuest only when you Interact; walking over it does not activate it. Return to the Gallery with the key: outer door 1 at (10, 12) opens while neither plate nor its remaining hold is engaged. Enter the antechamber and step on the plate at (10, 10): it activates immediately, closes outer door 1 and opens inner door 2 at (10, 7). After stepping off, the plate holds for 2.5 seconds; cross the inner door during that hold. The optional chest at (10, 2) holds 100 Credits. To return, step on the sanctum plate at (10, 6), cross inner door 2, then step off both plates and wait for every remaining hold to expire so the key-held outer door 1 reopens. Leave through the Port Subnet return at (10, 15). The images show only the supplied key-held, unpressed snapshot, not an earned traversal or pressed-plate demonstration. Successful saves preserve the key and chest state; momentary plate/door/hold state is not serialized, and cached room instances can retain a remaining hold while away.
The only map in the game with no entrance. It is a paid arena run: accept the BACK ALLEY STRESS contract at a Future Ops terminal for 6 credits (requires the hall booted) and you are dropped in. Clearing every enemy pays 12 credits and grants the SERVICE RIG once.
SPOILERS AHEAD — Chapter 3 is late-game content, including the final boss. Nothing below is hidden; stop here if you are still on Chapter 2.
The cathedral mistakes holding for mercy. Meet JUNO, recover the caretaker route, then follow the existing cathedral chain for the Pond, Scriptorium and Switchboard sigils. RELEASE TO THE ROAD changes the world outward; Root Heart asks you to release its three separate finite supports during recovery.
Release the switchboardClear the room, preview RELEASE TO THE ROAD, then APPLY for the Switchboard Sigil.
Open the Root HeartCaretaker route + three sigils. Clear ordinary threats, then confirm the boss. Release its finite supports, defeat it and read the saved four-page ending.
Every door between Chapter 3 maps, laid out by distance from the hub. Magenta dashes are secret doors. Click a room to jump to its map.
The only map with a walk-under canopy layer, so parts of the route are hidden beneath the trees on screen. The caretaker house is west, the cathedral is south-east, and JUNO stands between them.
The pavement ends where the root network begins. Every step past here is remembered twice.Road plaque
Chapter arrival discovers the Old Forest Road return node. The cathedral chain has return doors for backtracking; use them or an available Reroute without losing the current chapter.
The tree canopy genuinely occludes the player. If you lose yourself, keep walking; you are still there.
Key
1
Back to Port Subnet(12, 1)
2
Forest Caretaker House(6, 4)Use the house terminal for the caretaker route. The three cathedral sigils are separate requirements.
3
Future Ops terminal(17, 6)Offers optional Future Ops services. The earned chapter arrival already discovers the Old Forest Road return node.
4
Root Cathedral Foyer(14, 11)The point of no scenery. Five rooms in a straight chain from here.
5
Chest — 10 credits(4, 12)
6
Forest Stall(4, 14)
7
JUNO, FOREST SCRIBE(10, 14)Frames the chapter's moral problem and records the soft meet-JUNO step. The caretaker route also advances that story step. Return after switchboard release for JUNO's response.
The last reroute node before the chain. One enemy, one obelisk, two doors.
The network grew a nave around the first buried switch.Foyer plaque
Threats 1× Root Knight
Key
1
To the Pond→ Cathedral Pond(10, 2)
2
Future Ops terminal(14, 6)Reroute node — the last safe stop before the boss chain.
3
To Old Forest Road(10, 11)
Cathedral Pond
20 × 15 · POND SIGIL · CLEAR THE ROOM
Cathedral Pond20 × 15 tiles · 320 × 240 px native
1234
Two Forest Wisps circle the water. The terminal refuses to read until both are dead.
Still water caches every face that looked for the heart.Pond plaque
Threats 2× Swarm
Key
1
To the Scriptorium(16, 7)
2
POND SIGIL(13, 8)Refuses while anything is alive: "The pond will not reflect clearly while threats ripple the room." Clear both Swarms first.
3
Chest — 14 credits(15, 9)
4
To Root Cathedral Foyer(10, 11)
Scriptorium
20 × 15 · SCRIPTORIUM SIGIL
Scriptorium20 × 15 tiles · 320 × 240 px native
1234
The easy one. One enemy, one free read. Optional later revisit: the chest at (2, 10) holds the Portal Key for the Portal Gallery.
Root-scribes copied the route until the ink learned to crawl.Scriptorium plaque
Threats 1× Caster (elite)
Key
1
SCRIPTORIUM SIGIL(13, 4)Free on read. The only sigil with no condition.
2
To Cathedral Pond(2, 7)
3
Chest — SIGNAL VISOR(15, 9)
4
To the Switchboard(10, 11)
Switchboard
20 × 15 · SWITCHBOARD SIGIL · CLEAR THE ROOM
Switchboard20 × 15 tiles · 320 × 240 px native
12345
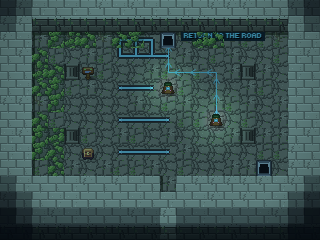
Supplied released, room-clear Switchboard view. Cyan arrows lead outward to the Scriptorium return (marker 1), with the world cue RETURN TO THE ROAD; the production canopy partly covers that label. Runner, actors and interface panels hidden; the 16-Credit chest is unopened. Numbered annotations and enemy markers retain authored locations; they do not show live enemies.
Clear the Root Knight and elite Glitch, then preview RELEASE TO THE ROAD and APPLY. HOLD/Cancel are free and grant no sigil. Release is permanent; outward cues persist here and in the foyer, and JUNO responds on revisit.
Every forest line terminates here. Choose what gets to answer.Switchboard plaque
Threats 1× Root Knight · 1× Glitch (elite)
Key
1
To Scriptorium(10, 2)
2
Future Ops terminal(10, 5)A shop only. Despite appearances this room is NOT a reroute node.
3
SWITCHBOARD SIGIL — RELEASE TO THE ROAD(13, 7)Requires room clear. APPLY RELEASE TO THE ROAD for the third cathedral sigil and permanent outward flow. This world repair does not release the separate boss supports.
4
Chest — 16 credits(5, 9)
5
To the Root Heart→ Root Cathedral Heart(16, 10)Last door in the game.
Clear the Cooling Warden and elite Caster before summoning Root Heart. The terminal requires the caretaker route and all three cathedral sigils; ordinary threats cannot fight alongside the boss.
The seal, the echo, the hoard: one hold. Carry the names out. Leave none behind.Heart threshold reveal
Threats 1× Cooling Warden · 1× Caster (elite)
Runner's notes
Clear the two ordinary elites, then explicitly confirm the boss. The free threshold reveal appears in confirmation; reading the plaque separately is optional.
During recovery, face a support and press interact once to release it. West removes sidebolts, east removes the second lane pulse, north removes horizontal pursuit. Attack only in recovery after opening the HP floors.
Key
1
THE FINAL SEAL — boss trigger(10, 6)Requires caretaker route + Pond, Scriptorium and Switchboard sigils, plus room clear. Interact and confirm Root Heart. The optional SERVICE RIG chest is not a prerequisite.
TOTAL SPOILERS — this section exists to be spoiled. It is the ending of all three chapters.
Three encounters ask for different responses: Desync commits its aim, Archive Echo repeats a recorded lane, and Root Heart loses pressure as you release finite supports. Each begins after an explicit confirmation and a full-health sanctuary checkpoint. No bow, paid upgrade, consumable or optional chest is required. Boss completion pays a fixed 2 Credits once; summoned enemies give no persistent Credits or contract progress.
THE DESYNC
Chapter 1 · 12 HP · phase flip at 6
Where Plaza boss arena, tile (10, 12)
Trigger Interact with the Sync Shrine and confirm, with Shard, Gateway open and Relay synced.
The route begged for silence. I gave it a seal.
Leave the dashed aim ray before the committed shot. Desync stops for its 0.65-second warning, fires, then recovers for 0.75 seconds. At 6 HP the warning shows all three fan rays; at most one live, marked Swarm adds pressure. Contact hurts only during pursuit. Desync remains vulnerable during pursuit, aim and recovery, so use spacing and short attacks.
Every name was true. Your ledger demanded only one.
Move fully out of the marked vertical lane and stay out for both pulses: the second repeats the same lane without retargeting. Echo then moves harmlessly to an unmarked pad. After it settles, attack during the full two-second correction window; it is guarded at every other time. No chase, contact damage or summons.
Trigger Confirm at the heart terminal after caretaker route, three cathedral sigils and room clear.
You would call release mercy. I call it forgetting.
Avoid the locked fan and repeated lane, then use the four-second recovery. Face and interact with each support once, in any order: WEST removes two sidebolts, EAST removes the second lane pulse, NORTH removes horizontal pursuit. With 0/1/2/3 released, HP cannot fall below 14/10/6/0. Weapon damage is accepted only during recovery. Released supports stay released for the attempt; no extra press is needed for the final six HP. Failure resets the attempt. Victory preserves the four-page ending and Completed Adventure; Explore Restored World keeps gear, repairs and settled bosses.
The bunker and Portal Gallery masonry open on inspection. Relay Annex and Quad H require their sequences; Archive Annex needs the free ledger permit, and Cooling Vault needs the hall boot. The gallery chest separately requires the optional Portal Key.
Ch
In
Tile
Leads to
What opens it
1
The Quiet Plaza
(4, 5)
Packetloss404 Bunker
A patch of suspicious brick in the north-west wall. Face it and press X once to reveal, again to enter. No prerequisite at all — you can open this on your very first lap.
1
The Relay Annex
(14, 4)
Broken Relay Vault
Read TRACE LEFT, TRACE CROWN, then TRACE RIGHT. The bricks remain sealed until that sequence is complete.
1
Quad H HQ
(16, 7)
Quad H Studio
The east bookcase opens after the Dr. Vibe terminal, stream rig sign and lab notes sign, in that order.
1
Quad H Studio
(12, 11)
Quad H Undercroft
Finish the HQ and Studio broadcast route, then Interact with the opened hatch.
1
Quad H Undercroft
(16, 10)
Empty cover — no passage
Read junctions 1, 2, 3 from north to south. The fan cover opens, but has no destination or reward. Continue through the south door.
1
Patch Bay
(11, 12)
Archive Core
Complete Carrier Basement, then read numbered trace panels 1–8 in order. Interact with the opened rack to continue.
2
Port Subnet
(22, 15)
Portal Gallery
The masonry opens on inspection. The optional 100-Credit chest behind the gallery corridor requires the Chapter 3 Portal Key; story progress never depends on this reward.
2
Civic Compute Hall
(3, 1)
Archive Annex
West wall of the lobby. Opens with Archive Override, granted free by the corrected Ledger Cellar. Root Phrase and Ledger Seal are still required at the annex admin terminal.
2
Compute Core
(15, 1)
Cooling Vault
Back wall of the core. Opens itself once the hall is booted.
Enemy placement census
Enemy
Tier
Placed
Where
Swarm
basic
22
The Quiet Plaza, The Under-Shrine, The Cable Marsh, Broken Relay Vault, West Under-Shrine, Service Tunnels, Cooling Vault, Back Alley Cache, Cathedral Pond
Glitch
basic
18
The Quiet Plaza, The Under-Shrine, The Cable Marsh, Marsh Relay Hut, Marsh Pump House, The Relay Annex, Broken Relay Vault, The Signal Tower, The Seal Archive, Service Tunnels
Sentinel
basic
10
The Quiet Plaza, The Relay Annex, Broken Relay Vault, West Under-Shrine, The Signal Tower, Service Tunnels, Old Forest Road
Glitch (elite)
elite
7
The Quiet Plaza, Service Tunnels, Ledger Cellar, Cooling Vault, Back Alley Cache, Old Forest Road, Switchboard
Caster (elite)
elite
7
Service Tunnels, Ledger Cellar, Cooling Vault, Archive Annex, Old Forest Road, Scriptorium, Root Cathedral Heart
Caster
basic
3
The Quiet Plaza, The Under-Shrine, Broken Relay Vault
Sentinel (elite)
elite
2
Cooling Vault, Back Alley Cache
Cooling Warden
elite
2
Cooling Vault, Root Cathedral Heart
Forest Wisp
basic
2
Old Forest Road
Root Knight
elite
2
Root Cathedral Foyer, Switchboard
Door index — illustrated routes
Every door and secret door, where it goes, and the tile you arrive on.
From
Door tile
To
Arrive at
The Quiet Plaza
(20, 5)
The Under-Shrine
(12, 18)
The Quiet Plaza
(7, 5)
The Signal Tower
(7, 9)
The Quiet Plaza
(13, 5)
Old Runner House
(6, 8)
The Quiet Plaza
(4, 5)
secret
Packetloss404 Bunker
(9, 9)
The Quiet Plaza
(37, 9)
The Cable Marsh
(10, 12)
The Quiet Plaza
(35, 10)
Marsh Pump House
(6, 8)
The Quiet Plaza
(33, 20)
Quad H HQ
(9, 10)
The Quiet Plaza
(24, 5)
The Relay Annex
(7, 10)
The Under-Shrine
(12, 19)
The Quiet Plaza
(20, 7)
The Under-Shrine
(1, 1)
West Under-Shrine
(11, 10)
Old Runner House
(10, 11)
The Quiet Plaza
(13, 6)
The Cable Marsh
(10, 12)
The Quiet Plaza
(37, 10)
The Cable Marsh
(14, 7)
Marsh Relay Hut
(9, 10)
Marsh Relay Hut
(9, 10)
The Cable Marsh
(13, 8)
Marsh Pump House
(10, 10)
The Quiet Plaza
(35, 11)
The Relay Annex
(9, 11)
The Quiet Plaza
(24, 7)
The Relay Annex
(14, 4)
secret
Broken Relay Vault
(10, 14)
Broken Relay Vault
(10, 15)
The Relay Annex
(14, 5)
West Under-Shrine
(11, 11)
The Under-Shrine
(2, 1)
The Signal Tower
(9, 11)
The Quiet Plaza
(7, 6)
Packetloss404 Bunker
(9, 11)
The Quiet Plaza
(4, 6)
Packetloss404 Bunker
(19, 6)
The Seal Archive
(10, 11)
The Seal Archive
(10, 11)
Packetloss404 Bunker
(18, 6)
Quad H HQ
(10, 11)
The Quiet Plaza
(33, 19)
Quad H HQ
(16, 7)
secret
Quad H Studio
(11, 11)
Quad H Studio
(11, 12)
Quad H HQ
(15, 7)
Quad H Studio
(12, 11)
secret
Quad H Undercroft
(10, 3)
Quad H Undercroft
(10, 2)
Quad H Studio
(12, 10)
Quad H Undercroft
(10, 11)
Carrier Basement
(9, 2)
Carrier Basement
(9, 1)
Quad H Undercroft
(10, 10)
Carrier Basement
(9, 12)
Patch Bay
(11, 1)
Patch Bay
(11, 1)
Carrier Basement
(9, 11)
Patch Bay
(11, 12)
secret
Archive Core
(10, 3)
Archive Core
(10, 2)
Patch Bay
(11, 11)
Archive Core
(10, 11)
Quiet Room
(10, 3)
Quiet Room
(10, 2)
Archive Core
(10, 10)
Quiet Room
(10, 11)
Room Behind
(10, 2)
Room Behind
(11, 1)
Quiet Room
(10, 10)
Port Subnet
(11, 3)
Civic Compute Hall
(9, 10)
Port Subnet
(4, 10)
North Row House
(6, 8)
Port Subnet
(19, 10)
East Row House
(6, 8)
Port Subnet
(3, 12)
South Row House
(6, 8)
Port Subnet
(20, 12)
West Row House
(6, 8)
Port Subnet
(13, 9)
Ledger Cellar
(8, 10)
Port Subnet
(15, 16)
Old Forest Road
(12, 2)
Port Subnet
(18, 13)
Service Tunnels
(12, 10)
Port Subnet
(22, 15)
secret
Portal Gallery
(10, 14)
North Row House
(10, 11)
Port Subnet
(4, 11)
South Row House
(10, 11)
Port Subnet
(3, 13)
Service Tunnels
(12, 11)
Port Subnet
(18, 14)
Ledger Cellar
(10, 11)
Port Subnet
(13, 10)
Civic Compute Hall
(10, 11)
Port Subnet
(11, 4)
Civic Compute Hall
(15, 5)
Compute Core
(5, 9)
Civic Compute Hall
(3, 1)
secret
Archive Annex
(9, 10)
Compute Core
(5, 11)
Civic Compute Hall
(14, 6)
Compute Core
(15, 1)
secret
Cooling Vault
(10, 12)
Cooling Vault
(10, 12)
Compute Core
(15, 2)
Archive Annex
(9, 10)
Civic Compute Hall
(3, 2)
East Row House
(10, 11)
Port Subnet
(19, 11)
West Row House
(10, 11)
Port Subnet
(20, 13)
Portal Gallery
(10, 15)
Port Subnet
(21, 15)
Back Alley Cache
(10, 10)
Port Subnet
(13, 9)
Old Forest Road
(12, 1)
Port Subnet
(15, 15)
Old Forest Road
(6, 4)
Forest Caretaker House
(6, 8)
Old Forest Road
(14, 11)
Root Cathedral Foyer
(9, 10)
Forest Caretaker House
(10, 11)
Old Forest Road
(6, 5)
Root Cathedral Foyer
(10, 11)
Old Forest Road
(14, 10)
Root Cathedral Foyer
(10, 2)
Cathedral Pond
(10, 11)
Cathedral Pond
(10, 11)
Root Cathedral Foyer
(10, 3)
Cathedral Pond
(16, 7)
Scriptorium
(3, 7)
Scriptorium
(2, 7)
Cathedral Pond
(15, 7)
Scriptorium
(10, 11)
Switchboard
(10, 3)
Switchboard
(10, 2)
Scriptorium
(10, 10)
Switchboard
(16, 10)
Root Cathedral Heart
(3, 10)
Root Cathedral Heart
(2, 10)
Switchboard
(15, 10)
Historical errata and retained map plates
Historical Chapter 2 omissions. Voice B and Ledger Seal were added to the older walkthroughs in August. The current route above includes both voices, room-clear ledger correction and the free permit; the former 10-Credit purchase is obsolete.
PIP is at tile (13, 19).Resolved 2026-08-26: MASTER_GUIDE used to give (16, 19) in two places; it now agrees with the map data.
There is no "Root Charm".Resolved: both docs now say PACKET PIN, which is what the caretaker house chest holds.
Back Alley Cache has no door. No map in the game links to it. It is a paid arena run bought from a Future Ops terminal, which is why you will never find it by exploring.
Historical early Chapter 3 travel bypass. Walking and interacting now share campaign availability checks. Earn Chapter 2 completion, then use the saved arrival flow; profile Practice unlocks do not bypass adventure gates.
Portal Gallery is optional. Its entrance opens on inspection; its 100-Credit chest requires the Chapter 3 Portal Key. No chest or purchase funds a mandatory story step.
Historical Relay Annex bypass.Resolved 2026-08-26: the vault bricks now hold ("THE PLASTER HOLDS") until the three signs are read in order. The Quad H undercroft fan and patch-bay rack got the same treatment; the bunker bricks and the Portal Gallery masonry still open on inspect by design.
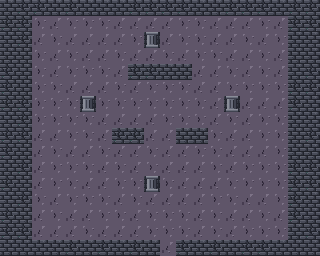
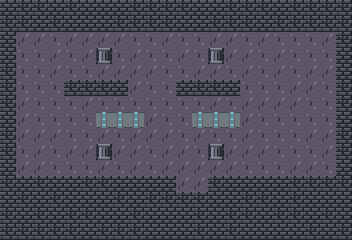
Retained plates and corrected annotations. The callouts now distinguish the caretaker route from the three cathedral sigils. The West Row chest marker now names SIGNAL BOW. The Pump comparison shows supplied exploration states; repair previews are not shown. Other retained plates still omit temporary boss supports and the gallery corridor's key gate; follow the current text for these mechanics. Further asset updates remain a separate follow-up.
 1234567891011121314151617181920
 12345
 123
 123
 123
 123
 123456
 1234
 123
 123
 1234
 1234
 12345
 1234
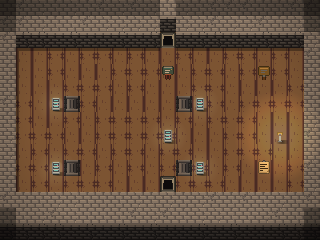
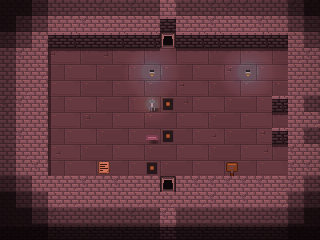
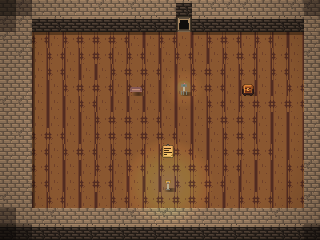
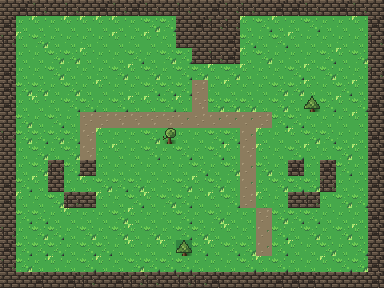 12345678910111213
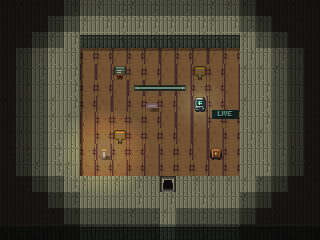 123456
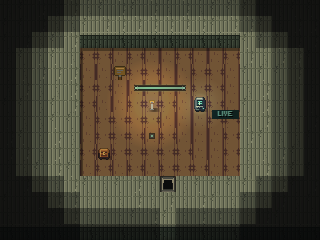 123
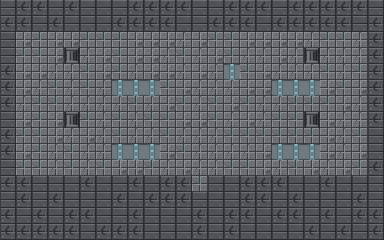 123
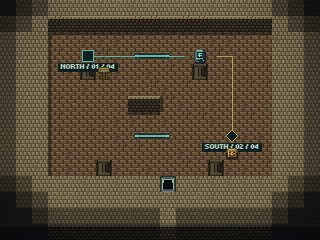 123
 1234
 12345
 123
 123
 123
 123
 1234567
 12
 12345678
 123
 123
 1234
 1234
 12345
 123